


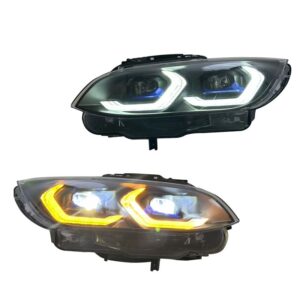
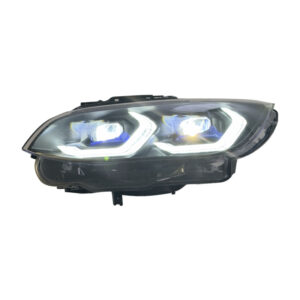


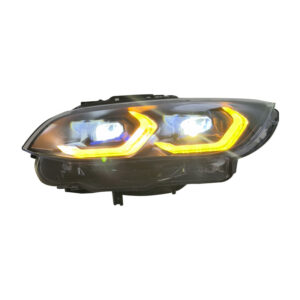

Dual-Color LED Headlight Assembly (F30/F35)

R30 917,70
The Dual-Color LED Headlight Assembly is a functional and stylish upgrade for BMW 3-Series F30/F35 vehicles. It combines advanced lighting capability with aesthetic enhancement and user-friendly installation. Ideal for drivers seeking both improved performance and contemporary design in one package.
This upgraded LED headlight assembly is a popular aftermarket choice for BMW 3-Series (F30/F35) owners looking to modernize the appearance of their vehicle and improve light output. Below is a breakdown of what you should expect regarding performance, compatibility, and installation.
Performance and Aesthetics
-
Visibility: These assemblies typically provide a significant improvement (often reported as 40–60% brighter) over stock halogen units. The use of high-performance LED projectors provides a sharper beam cutoff, which is critical for safety.
-
Dual-Color Functionality: The ability to switch between white (approx. 6000K) and amber (approx. 3000K) is a key feature. White is standard for high-visibility night driving, while the amber mode helps cut through glare in fog, rain, or snow.
-
Modern Styling: These units often mimic the “LCI” (Life Cycle Impulse) look, featuring distinct LED daytime running light (DRL) strips or “angel eyes” that bring the older F30 styling in line with newer BMW models.
Installation and “Plug-and-Play” Reality
While manufacturers often market these as “plug-and-play,” it is important to understand the difference between physical and electronic compatibility:
-
Physical Fitment: The units are generally designed to bolt directly into the factory mounting points without modification to the bumper or fender.
-
Electronic Compatibility (Coding): This is the most common “catch.” Because LEDs draw significantly less power than the halogen bulbs your car was originally designed for, the BMW’s Electronic Control Unit (ECU) may incorrectly detect a “bulb out” error or experience flickering.
-
Coding: You may need a tool like BimmerCode or ISTA to tell the car’s computer that it is now using LED headlights, which disables the bulb-check voltage pulses.
-
CANbus Adapters: Some kits come with built-in resistors or CANbus decoders to simulate the power draw of a halogen bulb; if yours does not, you may need to purchase these separately to avoid error codes.
-
Common Pitfalls and Tips
-
Error Codes: Even with “plug-and-play” kits, users frequently report dashboard warnings (e.g., “Turn signal malfunction”). These are usually resolved by coding the ECU to recognize the LED conversion.
-
Alignment: After installation, you must align the headlights. A misaligned beam can blind oncoming drivers and may cause you to fail vehicle inspections.
-
Seal Quality: Ensure the rubber gaskets are seated correctly during installation. Moisture condensation inside the lens is the most common cause of early failure in aftermarket assemblies.
-
Certification: If you are in a region with strict vehicle inspections (such as parts of Europe or certain U.S. states), check if the assembly is DOT/SAE or E-mark certified. Non-certified assemblies can sometimes cause issues during safety inspections.
Summary Checklist for Buyers
-
Verify your current setup: Know if your car currently has halogen, xenon, or standard LEDs, as this can affect which adapter/harness you might need.
-
Budget for coding: Don’t assume it will be 100% error-free upon plugging in. Have access to a coding app (like BimmerCode) or a technician who can clear potential “bulb out” codes.
-
Inspect seals: Before installing, double-check that the rear housing covers are tightly sealed to prevent water ingress.
-
Keep original parts: It is highly recommended to hold onto your factory halogen/xenon assemblies in case you need to revert to stock for inspections or if you decide to sell the vehicle later.
Related products
Vehicle Parts & Accessories
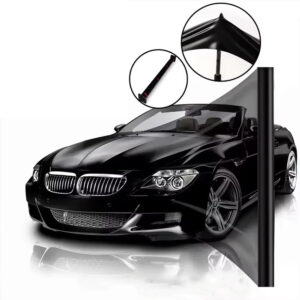
Anti-Scratch TPU Paint Protection Film for Automotive Surfaces


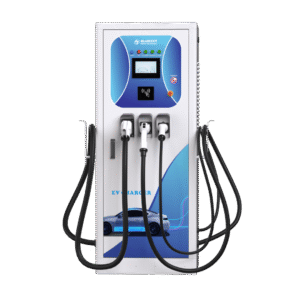

Electrical Equipment & Supplies


Vehicle Parts & Accessories
Universal 4×4 Off‑Road LED Strip & Work Light Kit FORD F150 Ranger